Moodles
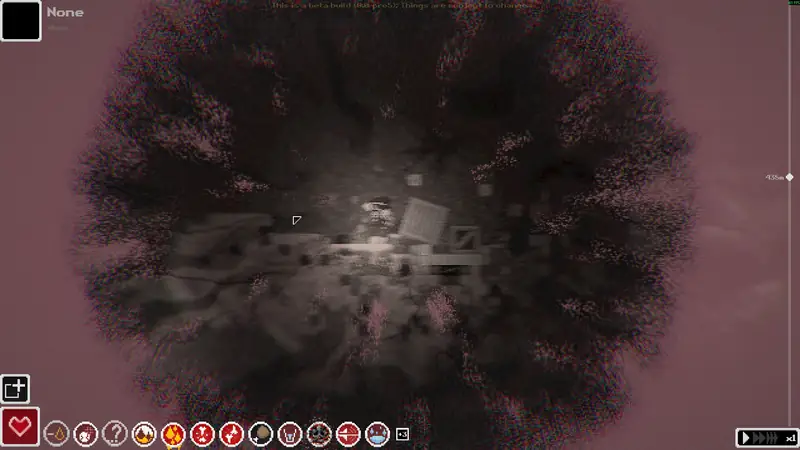
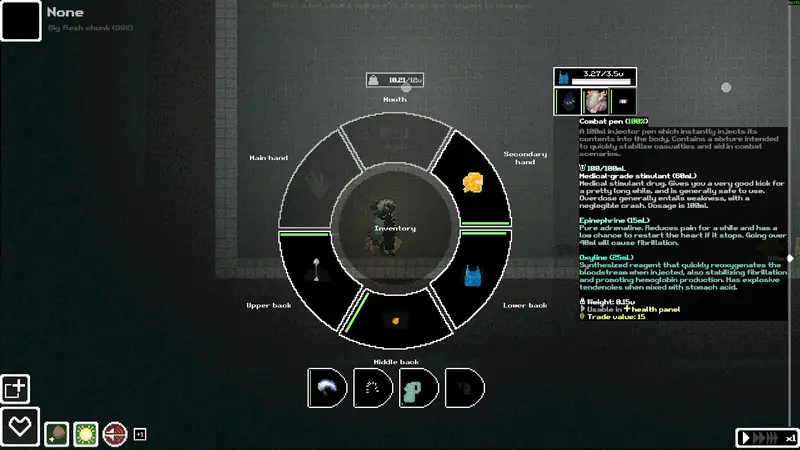
Identify 171 named status icons from the community moodle reference. Search by name or body system, compare the trigger and check the related health panel. Positive or neutral icons normally have a rectangular frame; harmful icons normally use a circular frame, with exceptions such as Adrenaline and Last Stand.
Mood ladder
Happy and depression are each written as four steps, plus Hollow as its own state. Gleeful and really happy are steps on that same ladder, not separate mechanics, so they stay in this section instead of getting their own pages. The console field the wiki uses for mood is happiness, from about -100 to +100. The command itself lives on the commands page.
Groups the wiki lists
I am listing the groups, not inventing a number for every icon. The Moodles page groups them as mood, horrified, traumatized, energy, exertion, hunger, weight, thirst, sickness, heat, cold, encumbrance, wet, dirty, heart, blood, consciousness, oxygen, opioids, radiation, pressure, pain, lungs, physical injuries, prosthetics, brain, infection, venom, hearing, speech, and cargo. Bradycardia, tachycardia, and palpitations show only while unchipped.
Hollow
Hollow is the state after a mindwipe: memory, trauma, and recipes cleared, INT back at 0. It has its own page because people search the name.
Weird feeling is not an icon. It is a line the character says on an infected limb before the infection is visible. I kept a page so the search does not dead-end, and I do not draw a fake icon for it.
Status icon reference
| Icon and name | System | Trigger | Requires chip | Documented effect | Next check | Status |
|---|---|---|---|---|---|---|
 Satisfied | Mood | Happiness > 10 | No | Positive mood tier | Read the mood scale; food, rest and activities affect happiness. | 1 source · community wiki |
 Excited | Mood | Happiness > 30 | No | Positive mood tier | Read the mood scale; food, rest and activities affect happiness. | 1 source · community wiki |
 Happy | Mood | Happiness > 50 | No | Positive mood tier | Read the mood scale; food, rest and activities affect happiness. | 1 source · community wiki |
 Gleeful | Mood | Happiness ≥ 75 | No | Highest displayed positive mood tier | Read the mood scale; food, rest and activities affect happiness. | 1 source · community wiki |
 Feeling down | Mood | Happiness < -10 | No | Read the mood scale; food, rest and activities affect happiness. | 1 source · community wiki | |
 Gloomy | Mood | Happiness < -30 | No | Read the mood scale; food, rest and activities affect happiness. | 1 source · community wiki | |
 Depressed | Mood | Happiness < -50 | No | Read the mood scale; food, rest and activities affect happiness. | 1 source · community wiki | |
 Miserable | Mood | Happiness ≤ -75 | No | Read the mood scale; food, rest and activities affect happiness. | 1 source · community wiki | |
 Hollow | Mood | Mindwiped | No | Mood moves toward zero; trauma decreases; speech disabled | Read the mood scale; food, rest and activities affect happiness. | 1 source · community wiki |
 Sense of impending doom | Horrified | Horror > 0, Horror ≤ 50 | No | Find the threat and plan an escape; see Elder Thornback. | 1 source · community wiki | |
 HORRIFIED | Horrified | Horror > 50 | No | Find the threat and plan an escape; see Elder Thornback. | 1 source · community wiki | |
 FOCUSED | Horrified | Focus > 0 | No | Find the threat and plan an escape; see Elder Thornback. | 1 source · community wiki | |
 Scared | Traumatized | Trauma > 25 | No | See mood and trauma; take time away from danger. | 1 source · community wiki | |
 Traumatized | Traumatized | Trauma > 45 | No | See mood and trauma; take time away from danger. | 1 source · community wiki | |
 Shell shocked | Traumatized | Trauma > 80 | No | See mood and trauma; take time away from danger. | 1 source · community wiki | |
 Sleeping | Energy | Consciousness ≤ 20% | No | Check energy and find a suitable sleeping surface. | 1 source · community wiki | |
 Bad sleep | Energy | Bad sleep > 0 | Yes | Reduced consciousness | Check energy and find a suitable sleeping surface. | 1 source · community wiki |
 Energized | Energy | Caffeine > 0 | Yes | Reduced stamina loss and sleepiness | Check energy and find a suitable sleeping surface. | 1 source · community wiki |
 Stimulated | Energy | On hard stimulants | Yes | Check energy and find a suitable sleeping surface. | 1 source · community wiki | |
 Drowsy | Energy | Energy < 35% | No | Energy warning | Check energy and find a suitable sleeping surface. | 1 source · community wiki |
 Tired | Energy | Energy < 25% | No | Energy warning | Check energy and find a suitable sleeping surface. | 1 source · community wiki |
 Very tired | Energy | Energy < 15% | No | Energy warning | Check energy and find a suitable sleeping surface. | 1 source · community wiki |
 Half-asleep | Energy | Energy ≤ 7% | No | Energy warning | Check energy and find a suitable sleeping surface. | 1 source · community wiki |
 Slightly exerted | Exertion | Stamina < 70% | No | Stop strenuous movement and allow stamina to recover. | 1 source · community wiki | |
 Exerted | Exertion | Stamina < 50% | No | Stop strenuous movement and allow stamina to recover. | 1 source · community wiki | |
 Highly exerted | Exertion | Stamina < 35% | No | Stop strenuous movement and allow stamina to recover. | 1 source · community wiki | |
 Totally exhausted | Exertion | Stamina ≤ 15% | No | Stop strenuous movement and allow stamina to recover. | 1 source · community wiki | |
 Peckish | Hunger | Hunger < 80 at Happiness >= 0, scales down to Hunger < 40 at -100 Happiness | No | Check food reserves and eat an identified food. | 1 source · community wiki | |
 Hungry | Hunger | Hunger < 60 at Happiness >= 0, scales down to Hunger < 30 at -100 Happiness | No | Check food reserves and eat an identified food. | 1 source · community wiki | |
 Very hungry | Hunger | Hunger < 40 at Happiness >= 0, scales down to Hunger < 20 at -100 Happiness | No | Check food reserves and eat an identified food. | 1 source · community wiki | |
 Starving | Hunger | Hunger <= 17.5f at Happiness >= 0, scales down to Hunger <= 8.75 at -100 Happiness | No | Check food reserves and eat an identified food. | 1 source · community wiki | |
 Satiated | Hunger | Hunger > 100 | No | Check food reserves and eat an identified food. | 1 source · community wiki | |
 Full | Hunger | Hunger > 120 | No | Check food reserves and eat an identified food. | 1 source · community wiki | |
 Underweight | Underweight | Weight < 44.9kg | Yes | Manage food intake; compare the character-specific weight thresholds. | 1 source · community wiki | |
 Skinny | Underweight | Weight < 39.8kg | Yes | Manage food intake; compare the character-specific weight thresholds. | 1 source · community wiki | |
 Malnourished | Underweight | Weight < 36.4kg | No | Manage food intake; compare the character-specific weight thresholds. | 1 source · community wiki | |
 Emaciated | Underweight | Weight ≤ 33kg | No | Manage food intake; compare the character-specific weight thresholds. | 1 source · community wiki | |
 Chubby | Overweight | Weight > 55.1kg | Yes | Manage food intake; compare the character-specific weight thresholds. | 1 source · community wiki | |
 Overweight | Overweight | Weight > 60.2kg | Yes | Manage food intake; compare the character-specific weight thresholds. | 1 source · community wiki | |
 Fat | Overweight | Weight > 63.6kg | No | Manage food intake; compare the character-specific weight thresholds. | 1 source · community wiki | |
 Obese | Overweight | Weight ≥ 67kg | No | Manage food intake; compare the character-specific weight thresholds. | 1 source · community wiki | |
 Thirsty | Thirst | Hydration < 75 | No | Check hydration; drink deliberately and avoid overhydration. | 1 source · community wiki | |
 Dehydrated | Thirst | Hydration < 60 | No | Check hydration; drink deliberately and avoid overhydration. | 1 source · community wiki | |
 Parched | Thirst | Hydration < 40 | No | Check hydration; drink deliberately and avoid overhydration. | 1 source · community wiki | |
 Desiccated | Thirst | Hydration ≤ 20 | No | Check hydration; drink deliberately and avoid overhydration. | 1 source · community wiki | |
 Slaked | Thirst | Hydration > 100 | No | Check hydration; drink deliberately and avoid overhydration. | 1 source · community wiki | |
 Overhydrated | Thirst | Hydration > 125 | No | Check hydration; drink deliberately and avoid overhydration. | 1 source · community wiki | |
 Water-intoxicated | Thirst | Hydration > 175 | No | Check hydration; drink deliberately and avoid overhydration. | 1 source · community wiki | |
 Queasy | Sickness | Sickness > 10% | No | Identify the cause; sickness can follow food, fluids or other conditions. | 1 source · community wiki | |
 Nauseous | Sickness | Sickness > 30% | No | Identify the cause; sickness can follow food, fluids or other conditions. | 1 source · community wiki | |
 Sick | Sickness | Sickness > 50% | No | Identify the cause; sickness can follow food, fluids or other conditions. | 1 source · community wiki | |
 Grossly sick | Sickness | Sickness > 75% | No | Identify the cause; sickness can follow food, fluids or other conditions. | 1 source · community wiki | |
 Warm | Hot | Temperature > 38°C | No | Check body temperature and reduce heat exposure. | 1 source · community wiki | |
 Hot | Hot | Temperature > 39°C | No | Check body temperature and reduce heat exposure. | 1 source · community wiki | |
 Hyperthermia | Hot | Temperature > 40.2°C | No | Check body temperature and reduce heat exposure. | 1 source · community wiki | |
 Heatstroke | Hot | Temperature > 41.5°C | No | Check body temperature and reduce heat exposure. | 1 source · community wiki | |
 Chilly | Cold | Temperature < 35.5°C | No | Check temperature, wetness and exposure. | 1 source · community wiki | |
 Cold | Cold | Temperature < 34°C | No | Check temperature, wetness and exposure. | 1 source · community wiki | |
 Hypothermia | Cold | Temperature < 32.5°C | No | Check temperature, wetness and exposure. | 1 source · community wiki | |
 Freezing to death | Cold | Temperature < 28°C | No | Check temperature, wetness and exposure. | 1 source · community wiki | |
 Heavy load | Encumbrance | Encumbrance > 0 | No | Reduce carried mass and inspect containers. | 1 source · community wiki | |
 Encumbered | Encumbrance | Encumbrance > 0.3 | No | Reduced stamina and mobility | Reduce carried mass and inspect containers. | 1 source · community wiki |
 Very encumbered | Encumbrance | Encumbrance > 0.55 | No | Reduced stamina and mobility | Reduce carried mass and inspect containers. | 1 source · community wiki |
 Hampered | Encumbrance | Encumbrance > 0.85 | No | Severe carried-weight restriction | Reduce carried mass and inspect containers. | 1 source · community wiki |
 Damp | Hygiene | Wetness > 5% | No | Check wetness and dirtiness; dry or wash as appropriate. | 1 source · community wiki | |
 Wet | Hygiene | Wetness > 20% | No | Lower temperature and comfort | Check wetness and dirtiness; dry or wash as appropriate. | 1 source · community wiki |
 Soaked | Hygiene | Wetness > 45% | No | Wetness status | Check wetness and dirtiness; dry or wash as appropriate. | 1 source · community wiki |
 Water-logged | Hygiene | Wetness > 70% | No | Wetness status | Check wetness and dirtiness; dry or wash as appropriate. | 1 source · community wiki |
 Dirty | Hygiene | Dirtiness > 50% | No | Check wetness and dirtiness; dry or wash as appropriate. | 1 source · community wiki | |
 Very dirty | Hygiene | Dirtiness > 80% | No | Check wetness and dirtiness; dry or wash as appropriate. | 1 source · community wiki | |
 Adrenaline | Heart Conditions | Adrenaline > 20% | Yes | Numbs pain and raises alertness | Check heart rate and the health panel; see cardiac arrest treatment. | 1 source · community wiki |
 Bradycardia | Heart Conditions | Cardiac arrest == false, Heart rate < 60 | No | Check heart rate and the health panel; see cardiac arrest treatment. | 1 source · community wiki | |
 Tachycardia | Heart Conditions | Cardiac arrest == false, Heart rate > 110 | No | Check heart rate and the health panel; see cardiac arrest treatment. | 1 source · community wiki | |
 Palpitations | Heart Conditions | Cardiac arrest == false, and either Fibrillation > 50% or Heart rate > 240 | No | Check heart rate and the health panel; see cardiac arrest treatment. | 1 source · community wiki | |
 Arrhythmia | Heart Conditions | Fibrillation > 15% | Yes | Check heart rate and the health panel; see cardiac arrest treatment. | 1 source · community wiki | |
 Ventricular tachycardia | Heart Conditions | Fibrillation > 50% | Yes | Check heart rate and the health panel; see cardiac arrest treatment. | 1 source · community wiki | |
 Ventricular fibrillation | Heart Conditions | Fibrillation > 75% | Yes | Check heart rate and the health panel; see cardiac arrest treatment. | 1 source · community wiki | |
 Cardiac arrest | Heart Conditions | Cardiac arrest | No | No heart pumping; circulation fails without support | Check heart rate and the health panel; see cardiac arrest treatment. | 1 source · community wiki |
 Minor bleeding | Blood Conditions | Bleeding > 0 | No | Find bleeding or a volume problem; see the medicine guide. | 1 source · community wiki | |
 Bleeding | Blood Conditions | Bleeding > 0.06 | No | Find bleeding or a volume problem; see the medicine guide. | 1 source · community wiki | |
 Heavy bleeding | Blood Conditions | Bleeding > 0.15 | No | Find bleeding or a volume problem; see the medicine guide. | 1 source · community wiki | |
 Catastrophic bleeding | Blood Conditions | Bleeding > 0.3 | No | Find bleeding or a volume problem; see the medicine guide. | 1 source · community wiki | |
 Internal bleeding | Blood Conditions | Internal bleeding > 5 | Yes | Find bleeding or a volume problem; see the medicine guide. | 1 source · community wiki | |
 Mild hypotension | Blood Pressure | Cardiac arrest == false, Blood pressure < 110/73 | Yes | Check blood pressure together with blood volume and viscosity. | 1 source · community wiki | |
 Hypotension | Blood Pressure | Cardiac arrest == false, Blood pressure < 96/63 | Yes | Check blood pressure together with blood volume and viscosity. | 1 source · community wiki | |
 Severe hypotension | Blood Pressure | Cardiac arrest == false, Blood pressure < 83/55 | Yes | Check blood pressure together with blood volume and viscosity. | 1 source · community wiki | |
 Circulatory collapse | Blood Pressure | Cardiac arrest == false, Blood pressure < 60/40 | Yes | Check blood pressure together with blood volume and viscosity. | 1 source · community wiki | |
 Mild hypertension | Blood Pressure | Cardiac arrest == false, Blood pressure > 130/86 | Yes | Check blood pressure together with blood volume and viscosity. | 1 source · community wiki | |
 Hypertension | Blood Pressure | Cardiac arrest == false, Blood pressure > 145/96 | Yes | Check blood pressure together with blood volume and viscosity. | 1 source · community wiki | |
 Severe hypertension | Blood Pressure | Cardiac arrest == false, Blood pressure > 162/107 | Yes | Check blood pressure together with blood volume and viscosity. | 1 source · community wiki | |
 Hypertensive crisis | Blood Pressure | Cardiac arrest == false, Blood pressure > 180/119 | Yes | Check blood pressure together with blood volume and viscosity. | 1 source · community wiki | |
 Last stand | Consciousness | Last stand > 0 | No | Emergency survival state | Inspect oxygen, brain integrity and any sedating effects. | 1 source · community wiki |
 Confused | Consciousness | Consciousness < 90% | No | Inspect oxygen, brain integrity and any sedating effects. | 1 source · community wiki | |
 Very confused | Consciousness | Consciousness < 72% | No | Inspect oxygen, brain integrity and any sedating effects. | 1 source · community wiki | |
 Fainting | Consciousness | Consciousness < 55% | No | Inspect oxygen, brain integrity and any sedating effects. | 1 source · community wiki | |
 Incapacitated | Consciousness | Consciousness < 30% | No | Inspect oxygen, brain integrity and any sedating effects. | 1 source · community wiki | |
 Unconscious | Consciousness | Consciousness ≤ 20%, body.sleeping == false, not concussed | No | Inspect oxygen, brain integrity and any sedating effects. | 1 source · community wiki | |
 Concussed | Consciousness | Head muscle health below 14.4% | Yes | Consciousness penalty | Inspect oxygen, brain integrity and any sedating effects. | 1 source · community wiki |
 Mild hypoxemia | Oxygen | Blood oxygen < 90% | Yes | Find the cause of low oxygen or poor ventilation. | 1 source · community wiki | |
 Hypoxemia | Oxygen | Blood oxygen < 75% | Yes | Find the cause of low oxygen or poor ventilation. | 1 source · community wiki | |
 Severe hypoxemia | Oxygen | Blood oxygen < 60% | Yes | Find the cause of low oxygen or poor ventilation. | 1 source · community wiki | |
 Critical hypoxemia | Oxygen | Blood oxygen < 45% | Yes | Find the cause of low oxygen or poor ventilation. | 1 source · community wiki | |
 Opiated | Opioids | Actual opiate reception > 5 | Yes | Check opiate reception and tolerance; see naloxone and opium. | 1 source · community wiki | |
 Drugged | Opioids | Actual opiate reception > 20 | Yes | Check opiate reception and tolerance; see naloxone and opium. | 1 source · community wiki | |
 Highly drugged | Opioids | Actual opiate reception > 50 | Yes | Check opiate reception and tolerance; see naloxone and opium. | 1 source · community wiki | |
 Opioid overdose | Opioids | Actual opiate reception > 80 | Yes | Check opiate reception and tolerance; see naloxone and opium. | 1 source · community wiki | |
 Drug overdose | Opioids | Drug overdose > 0 | Yes | Check opiate reception and tolerance; see naloxone and opium. | 1 source · community wiki | |
 Opioid craving | Opioid Withdrawal | Actual opiate reception < -5 | Yes | Check tolerance; naloxone does not directly lower tolerance. | 1 source · community wiki | |
 Withdrawal | Opioid Withdrawal | Actual opiate reception < -15 | Yes | Check tolerance; naloxone does not directly lower tolerance. | 1 source · community wiki | |
 Severe withdrawal | Opioid Withdrawal | Actual opiate reception < -25 | Yes | Check tolerance; naloxone does not directly lower tolerance. | 1 source · community wiki | |
 Dying of withdrawal | Opioid Withdrawal | Actual opiate reception < -34 | Yes | Check tolerance; naloxone does not directly lower tolerance. | 1 source · community wiki | |
 Uncomfortable | Radiation | Radiation sickness > 3.0gy | Yes | Check exposure and the radiation status. | 1 source · community wiki | |
 Radiation sickness | Radiation | Radiation sickness > 9.0gy | Yes | Check exposure and the radiation status. | 1 source · community wiki | |
 Severe radiation sickness | Radiation | Radiation sickness > 15.0gy | Yes | Check exposure and the radiation status. | 1 source · community wiki | |
 Chernobyl wannabe | Radiation | Radiation sickness > 24.0gy | Yes | Check exposure and the radiation status. | 1 source · community wiki | |
 High pressure | Pressure | Pressure > 0, which builds up in the lower half of layer 9 and in layer 10 | Yes | Monitor late-layer pressure and progression. | 1 source · community wiki | |
 Very high pressure | Pressure | Pressure > 30 | Yes | Monitor late-layer pressure and progression. | 1 source · community wiki | |
 Barotrauma | Pressure | Pressure > 65 (pressure caps at 50 unless the "Crush depth damage" run setting is on) | No | Monitor late-layer pressure and progression. | 1 source · community wiki | |
 Critical barotrauma | Pressure | Pressure > 100 (requires the "Crush depth damage" run setting) | No | Monitor late-layer pressure and progression. | 1 source · community wiki | |
 Discomfort | Pain | Pain > 10% | No | Find the affected limb and the underlying injury. | 1 source · community wiki | |
 Pain | Pain | Pain > 30% | No | Find the affected limb and the underlying injury. | 1 source · community wiki | |
 Severe pain | Pain | Pain > 55% | No | Find the affected limb and the underlying injury. | 1 source · community wiki | |
 Agony | Pain | Pain > 80% | No | Find the affected limb and the underlying injury. | 1 source · community wiki | |
 Shock | Pain | Pain shock > 0.3 | No | Find the affected limb and the underlying injury. | 1 source · community wiki | |
 Mild hypoventilation | Lungs | Respiratory rate < 22/m | No | Check breathing and lung conditions in the health panel. | 1 source · community wiki | |
 Hypoventilation | Lungs | Respiratory rate < 12/m | No | Check breathing and lung conditions in the health panel. | 1 source · community wiki | |
 Hemothorax | Lungs | Hemothorax > 40 | Yes | Check breathing and lung conditions in the health panel. | 1 source · community wiki | |
 Pulmonary embolism | Lungs | Pulmonary embolism is being active | Yes | Check breathing and lung conditions in the health panel. | 1 source · community wiki | |
 Respiratory arrest | Lungs | body.breathing == false | No | Check breathing and lung conditions in the health panel. | 1 source · community wiki | |
 Lung failure | Lungs | Muscle health < 4 | No | Check breathing and lung conditions in the health panel. | 1 source · community wiki | |
 Fractured bone | Physical injuries | Max bone heal time > 0 Intensity 3: Max bone heal time > 32 min 18 s (~12 min 55 s with splint) Intensity 2: Max bone heal time 19 min 23 s – 32 min 18 s Intensity 1: Max bone heal time 6 min 28 s – 19 min 23 s Intensity 0: Max bone heal time ≤ 6 min 28 s | No | Inspect the specific limb; fractures and dislocations use different tools. | 1 source · community wiki | |
 Dislocated joint | Physical injuries | Max dislocation time > 0 Intensity 3: Max dislocation time > 19 min 50 s (~9 min 55 s with splint) Intensity 2: Max dislocation time 11 min 54 s – 19 min 50 s Intensity 1: Max dislocation time 3 min 58 s – 11 min 54 s Intensity 0: Max dislocation time ≤ 3 min 58 s | No | Inspect the specific limb; fractures and dislocations use different tools. | 1 source · community wiki | |
 Fractured neck | Physical injuries | Intensity 3: Bone heal (neck) > 32 min 18 s (~12 min 55 s with splint) Intensity 2: Bone heal (neck) 19 min 23 s – 32 min 18 s Intensity 1: Bone heal (neck) 6 min 28 s – 19 min 23 s Intensity 0: Bone heal (neck) ≤ 6 min 28 s | Yes | Inspect the specific limb; fractures and dislocations use different tools. | 1 source · community wiki | |
 Fractured ribs | Physical injuries | Intensity 3: Bone heal (ribs) > 32 min 18 s (~12 min 55 s with splint) Intensity 2: Bone heal (ribs) 19 min 23 s – 32 min 18 s Intensity 1: Bone heal (ribs) 6 min 28 s – 19 min 23 s Intensity 0: Bone heal (ribs) ≤ 6 min 28 s | Yes | Inspect the specific limb; fractures and dislocations use different tools. | 1 source · community wiki | |
 Dislocated jaw | Physical injuries | Intensity 3: Dislocation (jaw) > 19 min 50 s (~9 min 55 s with splint) Intensity 2: Dislocation (jaw) 11 min 54 s – 19 min 50 s Intensity 1: Dislocation (jaw) 3 min 58 s – 11 min 54 s Intensity 0: Dislocation (jaw) ≤ 3 min 58 s | No | Inspect the specific limb; fractures and dislocations use different tools. | 1 source · community wiki | |
 Dislocated spine | Physical injuries | Intensity 3: Dislocation (spine) > 19 min 50 s (~9 min 55 s with splint) Intensity 2: Dislocation (spine) 11 min 54 s – 19 min 50 s Intensity 1: Dislocation (spine) 3 min 58 s – 11 min 54 s Intensity 0: Dislocation (spine) ≤ 3 min 58 s | Yes | Inspect the specific limb; fractures and dislocations use different tools. | 1 source · community wiki | |
 Disfigured | Physical injuries | Jaw has been broken/missing | No | Inspect the specific limb; fractures and dislocations use different tools. | 1 source · community wiki | |
 Amputated | Physical injuries | Any limbs have been amputated | No | Inspect the specific limb; fractures and dislocations use different tools. | 1 source · community wiki | |
 Half-blind | Physical injuries | One eye has been ripped/missing | No | Inspect the specific limb; fractures and dislocations use different tools. | 1 source · community wiki | |
 Blind | Physical injuries | Both eyes have been ripped/missing | No | Inspect the specific limb; fractures and dislocations use different tools. | 1 source · community wiki | |
 Dulled claws | Physical injuries | Claw damage < 60 | No | Inspect the specific limb; fractures and dislocations use different tools. | 1 source · community wiki | |
 Broken claws | Physical injuries | Claw damage < 25 | No | Inspect the specific limb; fractures and dislocations use different tools. | 1 source · community wiki | |
 Boosted regrowth | Physical injuries | Claw regrowth > 0 | Yes | Inspect the specific limb; fractures and dislocations use different tools. | 1 source · community wiki | |
 Prosthetic limb | Prosthetics | Any prosthetic limb attached | No | Inspect attached prostheses and their required repair material. | 1 source · community wiki | |
 Loose screws | Prosthetics | A prosthetic limb is broken or has shrapnel in it | Yes | Inspect attached prostheses and their required repair material. | 1 source · community wiki | |
 Bent prosthesis | Prosthetics | A prosthetic limb is dislocated | No | Inspect attached prostheses and their required repair material. | 1 source · community wiki | |
 Critical material loss | Prosthetics | A prosthetic limb is broken | No | Inspect attached prostheses and their required repair material. | 1 source · community wiki | |
 Rapid neuron regeneration sickness | Brain | Brain regrowth sickness > 0 | Yes | Another brain-regrowth substance can trigger mindwipe | Check brain integrity and stroke; see braingrow and stroke guides. | 1 source · community wiki |
 Cognitive impairment | Brain | Brain integrity < 95 | Yes | Check brain integrity and stroke; see braingrow and stroke guides. | 1 source · community wiki | |
 Neurological damage | Brain | Brain integrity < 80 | Yes | Check brain integrity and stroke; see braingrow and stroke guides. | 1 source · community wiki | |
 Severe neurophysiological deterioration | Brain | Brain integrity < 60 | Yes | Check brain integrity and stroke; see braingrow and stroke guides. | 1 source · community wiki | |
 Comatose | Brain | Brain integrity < 30 | Yes | Check brain integrity and stroke; see braingrow and stroke guides. | 1 source · community wiki | |
 Stroke | Brain | Stroke > 70 | Yes | Advanced brain bleeding | Check brain integrity and stroke; see braingrow and stroke guides. | 1 source · community wiki |
 Immunocompetent | Base Infection | Immunity > 150% | Yes | Inspect local infection and whole-body sepsis. | 1 source · community wiki | |
 Immunocompromised | Base Infection | Immunity < 55% | Yes | Inspect local infection and whole-body sepsis. | 1 source · community wiki | |
 Infection | Base Infection | Max limb infection ≤ 80%, Max limb infection ≤ 60%, Max limb infection ≤ 40%, Max limb infection > 25% OR Any limb infection visible | Yes | Inspect local infection and whole-body sepsis. | 1 source · community wiki | |
 Painful infection | Base Infection | Max limb infection > 40% | No | Inspect local infection and whole-body sepsis. | 1 source · community wiki | |
 Severe infection | Base Infection | Max limb infection > 60% | No | Inspect local infection and whole-body sepsis. | 1 source · community wiki | |
 Life-threatening infection | Base Infection | Max limb infection > 80% | No | Inspect local infection and whole-body sepsis. | 1 source · community wiki | |
 Sepsis | Base Infection | Septic shock > 10% | Yes | Inspect local infection and whole-body sepsis. | 1 source · community wiki | |
 Severe sepsis | Base Infection | Septic shock > 50% | Yes | Inspect local infection and whole-body sepsis. | 1 source · community wiki | |
 Septic shock | Base Infection | Septic shock > 80% | Yes | Inspect local infection and whole-body sepsis. | 1 source · community wiki | |
 Mild toxicosis | Toxicosis | (body.venomCurrent + body.venomFake) > 2 | No | Identify the poisoning or venom source; see antivenom documentation. | 1 source · community wiki | |
 Toxicosis | Toxicosis | (body.venomCurrent + body.venomFake) > 25 | No | Identify the poisoning or venom source; see antivenom documentation. | 1 source · community wiki | |
 Severe toxicosis | Toxicosis | (body.venomCurrent + body.venomFake) > 55 | No | Identify the poisoning or venom source; see antivenom documentation. | 1 source · community wiki | |
 Toxic crisis | Toxicosis | (body.venomCurrent + body.venomFake) > 90 | No | Identify the poisoning or venom source; see antivenom documentation. | 1 source · community wiki | |
 Impaired hearing | Hearing loss | Hearing loss > 15% | No | Avoid further loud exposure and follow the hearing condition. | 1 source · community wiki | |
 Hearing loss | Hearing loss | Hearing loss > 40% | No | Avoid further loud exposure and follow the hearing condition. | 1 source · community wiki | |
 Severe hearing loss | Hearing loss | Hearing loss > 70% | No | Avoid further loud exposure and follow the hearing condition. | 1 source · community wiki | |
 Impaired speech | Impaired speech | Conscious while holding an item in mouth, has a dislocated jaw, or is disfigured | No | Check mouth equipment and the source of speech impairment. | 1 source · community wiki | |
 Cargo embedded | Late game | Carrying the cargo, once it has embedded itself | No | Late-game cargo state | This is a late-game story state; see endings. | 1 source · community wiki |
Questions
How do I change my mood?
The wiki's console example is setbodyfield happiness 100. That command is documented on the commands page, and the wiki does not say it voids achievements.
Related guides
Sources
| Source | Checked |
|---|---|
| Miraheze — Moodles (one community source; icons and thresholds) | 2026-11-12 |